
| Sun System Handbook | Home | Systems | Components | General Info | Search | Feedback | |
|
|
||
|
| ||
|
|
|
|||||||||||||
|
|
||||||||||||||||||||||||||||||||||||||||||||||||||||||||||||||||||||||
NeWSprinter 20Option NPRN-20
| ||||||||||||||||||||||||||||||||||||||||||||||||||||||||||||||||||||||
| PART # | DESCRIPTION |
|---|---|
| 370-1553 | NeWSprinter 20 (115V & 240V) 1 |
| 370-1556 | Adjustable Paper Tray |
| 370-1558 | Toner Cartridge Option NPTR20-TONER 2 |
| 370-1560 | Manual Feed Tray |
| 501-2275 | SPARCprinter 20 Printer Board |
| 530-2033 | Printer Cable, 10M |
| 565-1237 340-2875 370-1557 530-2033 530-2036 |
Accessory Kit Ledger Paper Support WireFace Up Outfield Paper TrayPrinter Cable, DB25 to DB25, 10 MAC Power Cord, 90° CEE22 to NEMA 5-15P Ledger Paper Support WireFace Up Outfield Paper TrayPrinter Cable, DB25 to DB25, 10 MAC Power Cord, 90° CEE22 to NEMA 5-15P |
| 370-1559 | Fuser Option NPRN20-FUSER 3 |
| 370-1554 | Aux Paper/Envelope Feeder Opt NPRN20-AUX-FEEDER |
| 370-1570 | Toner 3-Pack Option NPRN20-TONER-3 |
| 370-1622 370-1623 370-1625 370-1626 370-1627 370-1628 |
Hi-capacity Feeder, Letter, Option NPRN20-HI-FEEDER Hi-capacity Feeder, A4, Option NPRN20-HI-FEEDER Hi-capacity Feeder Interface CableHi-capacity Feeder Power SupplyHi-capacity Feeder Controller BoardHi-capacity Feeder Front Door |
| 811-1688 811-1749 |
Fuser Wick 94K95051 (available from SunExpress) Fuser Wick |
| 800-7918 800-7919 |
NeWSprinter 20 Installation and User's Guide NeWSprinter 20 Service Manual |
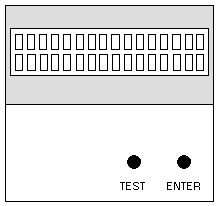
| Component | Test Code |
|---|---|
| FUSER TEMP. SET | DG 07 |
| FUSER TEMP. | DG 08 |
| SOLONOID TRAY1 | DG 80 (listen for a clicking sound) |
| SOLONOID TRAY3 | DG 81 (listen for a clicking sound) |
| SOLONOID TRAY2 | DG 86 (listen for a clicking sound) |
| REG. CLUTCH | DG 82 (listen for a clicking sound) |
| T.CLUTCH TRAY1 | DG 84 |
| T.CLUTCH TRAY2&3 | DG 85 (listen for a clicking sound) |
| SOLONOID MBF | DG 83 |
| MOTOR MBF | DG 87 |
| MOTOR MAIN &LEDs | DG 90 |
| HVPS(C.COROTRON ) | DG 91 |
| HVPS(DEV. BIAS) | DG 92 |
| HVPS(T.COROTRON ) | DG 93 |
| EXIT DIAG. | DG 00 |
| RAP | DESCRIPTION |
|---|---|
| C3 C5 C9 |
No paper tray is detected. The paper tray is empty. A paper tray print was requested when there is paper in the manual feed tray. |
| E2 E3 E4 E5 |
A paper jam in the media intake area has occurred. A paper jam in the transport area has occurred. A paper jam in the media exit area has occurred. The top cover is open. |
| J3 J4 J5 |
No toner cartridge is detected. The toner cartridge has reached end of life. The toner cartridge is empty. |
| U1 U2 U4 U6 |
The main motor speed dropped below normal during a print cycle. Laser Failure Fuser Failure NVRAM or RAM Failure |
|
Legal Terms Privacy Policy Feedback | |||