|
|
|
HP 88780 Front Load Tape Drive
Options 680 / 682 / 683 / 684
Read/Write/Format Board
370-1276
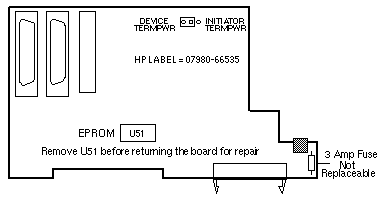
Drive Controller Board
370-1277
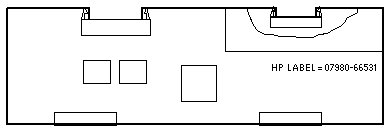
Single Ended I/O Board
811-1241
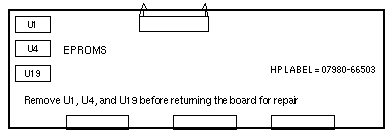
Data Buffer Board
370-1279
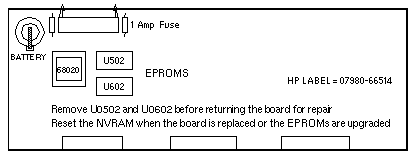
NVRAM Reset Procedure
- Load a scratch tape.
- Run TEST 150 to write a GCR ID to the scratch tape.
- Run TEST 128 to store the NVRAM contents to the scratch tape.
- Remove Power.
- Install the new Data Buffer Board or new EPROMs.
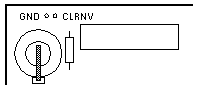
- Connect a jumper between locations GND and CLRNV.
- Apply power. FAIL--0 is displayed when selftest is complete.
- Remove Power.
- Remove the jumper.
- Apply Power.
- Load the scratch tape.
- Run TEST 129 to load NVRAM with the contents stored on tape.
- Rewind to BOT.
- Run TEST 99 to calibrate the read channel gain values.
Battery Notes
- The battery part number is 150-1204-01 or 811-1232-01.
- The battery is not replaceable on boards built after January 1990.
Reference
- Sun Front-Load 1/2-Inch Tape Drive Field Service Manual,800-3447.
Last updated: December 2, 1996
|
|
|