 To Cascade all Non-minimized Windows in a Workspace
This occurs only in the current workspace.
 To Tile all Non-minimized Windows in a Workspace
This occurs only in the current workspace.
Performing Window List Tasks from the Option Menu
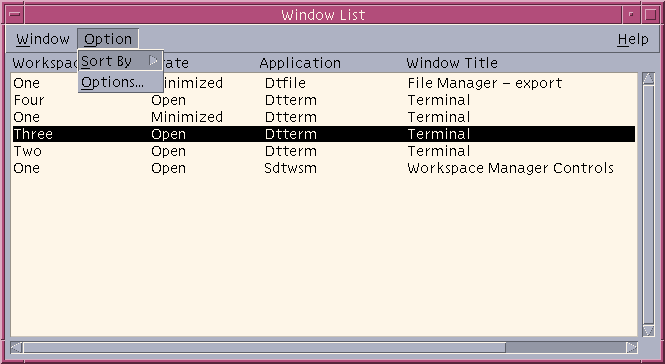
There are two tasks that can be performed from the Option Menu. They are:
Figure 7-7 Window List Option Menu

 Sorting Options
 Opening the Options Dialog
Window List Options
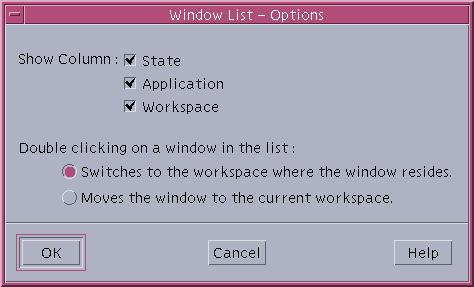
There are two options that you can change using the Window List - Options dialog box:
Show Column
Double-clicking on a window in the list
These two options allow the setting of which columns will appear in the Window List and what action will be taken when you double-click on a window item in the Window List.
Figure 7-8 Window List - Options Dialog

 To Show Columns
Click the State, Application, or Workspace check boxes for that column to be displayed.
The lack of a checkmark means the column will not be displayed.
Note - The Window Title column will always be visible.
 To Set the Action of a Double-click on a Window Entry
Window List provides the ability to select the effect of double-clicking a window entry in the Window List.
Click the Switches to the workspace where the window resides check box.
This has the effect of switching to the workspace that contains the selected window.
Click the Moves the window to the current workspace check box.
This has the effect of moving the selected window to the current workspace.
Workspace Manager
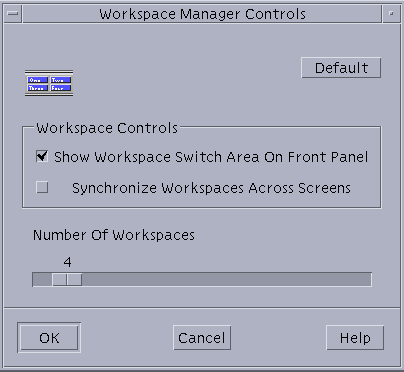
The Workspace Manager provides a Graphical User Interface (GUI) for controlling behavior and the number of workspaces. You will be able to add and delete workspaces using the slide bar. Workspace Manager enables you to show the Workspace Switch Area on the Front Panel instead of the workspace buttons. You will also be able to return to the default settings.
Figure 7-9 Workspace Manager Main Screen

Starting Workspace Manager
You can start the Workspace Manager either from the Workspace Menu or at the command line.
 To Start the Workspace Manager From the Desktop
Right-click on the Desktop to open the Workspace Menu.
Choose Applications.
Choose Application Manager from the submenu.
Double-click Desktop_Apps.
Double-click Workspace Manager Controls.
 To Start the Workspace Manager From the Command Line
Using Workspace Manager Controls
There are a number of functions that can be performed using the Workspace Manager:
 To Display the Workspace Switch Area on the Front Panel
 To Synchronize Workspaces Across Screens
 To Set the Number of Workspaces
Move the Number of Workspaces slide bar until the desired number of workspaces appears.
If the resulting number of workspaces is an addition, the new workspace icons will appear on the Front Panel.
(Optional) If the resulting number of workspaces is a reduction, the Workspace Manager Delete Workspace dialog box will appear. Click OK, if you want to delete the workspace(s).


